


Easy STEM activity: How to make a solar oven with a shoe box
- Jun 30, 2023
- 3 min read

Welcome to Makersgeneration, your #1 STEM learning website.
As usual, we will be working on another exciting task which for today's post is a solar oven science project.
In a world where sustainability and self-reliance are gaining increasing importance, discovering alternative ways to cook food while reducing our carbon footprint has become a pressing concern. Amidst this quest for eco-friendly solutions, a humble shoebox can surprisingly transform into an invaluable tool—an essential solar oven that harnesses the power of the sun.
Additionally, the versatility of a solar oven with a shoebox extends beyond its environmental benefits. Whether you're an outdoor enthusiast seeking a convenient cooking option during camping trips or just looking for an alternative cooking method during power outages, this DIY solar oven serves as a reliable solution. It offers a chance to embrace off-grid cooking while maintaining a connection with nature.
Keep reading to learn how to build a solar oven with household items!!
Materials needed

Shoebox with a lid or cardboard box of similar size.
Aluminum foil.
Additional cardboard to serve as the lid (if you're using a cardboard box)
Scissors.
Cutting knife.
Ruler.
Clear plastic or a clear oven bag.
Tape
Steps to make our Solar oven
Step 1
Take off the lid of the shoebox (if you are using a cardboard box - cut off the original box lid with scissors)

Step 2
Cover the inside of the box with aluminum foil.

Step 3
Now to the lid - (for those using cardboard box, use the extra cardboard reserved for the lid).
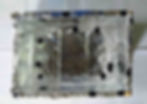
Measure a rectangle or square at the center of the lid and cut three sides and push the cut section outwards... as shown in the image below:

Step 4
Cover the square opening with transparent plastic (secure the plastic with glue or tape).

Step 5
Now, cover the cut-out section of the lid with aluminum foil.

Step 6
Place the lid on top of the box. (if you are working with a shoebox, the lid should fit nicely on the box).

Step 7
Support the cut-out section of the lid with tape or a pencil to keep it open.


Your solar oven is now ready for use!!!

How the solar oven works
A solar oven works by utilizing the sun's rays. The aluminum foil assists in reflecting, absorbing, distributing, and retaining heat within the solar oven, which is converted into heat energy. The transparent cover traps the heat, creating a greenhouse effect. The trapped heat gradually raises the temperature inside the oven. This elevated temperature allows for cooking or baking food placed inside the solar oven.
You can also add a dark material to the oven such as placing a black construction paper at the base of the box on top of the aluminum foil. This helps to absorb heat from the sunlight, contributing to its effectiveness in cooking food using solar energy.
Alright!! that will be all for this post.
Follow the information below to enjoy more from us. Thanks!!
Online summer camp and summer camps in Takoma Park Maryland
You and your children are looking for nice activities to have fun and learn new things and skills. Come join us starting in May and this summer for more online coding courses for kids such as:
Python coding for kids and teens
Coding for elementary school students
Make video games
Electronics
Digital modeling (Create cars, rockets, rings, etc) for 3D printing and much more with the following link: Online summer camp
And the STEM summer camp in Maryland for your kids is organized in Takoma Park Maryland nearby Washington DC to have fun and learn more about robotics, coding, droning, and more. Check the link right here:
Other cute things to make and hand-crafts for kids
If you are looking for more cool Arduino and kids' electronics project ideas to do with your kids, take a look at these other activities:
Learn Electronics for Kids: How to control light with an electronics board - arduino
Projects Arduino: How to measure the temperature with an Arduino board and a temperature sensor
Fun things to do indoors: How to make a Cartesian diver with a bottle of water
Electronics projects for kids: How to create an Arduino timer with a seven-segment display
Newsletter, follow, subscribe, and like the social media
If you like online STEM activities, consider subscribing to the newsletter and social media for updates, and don't miss any STEM events. Don't forget to subscribe to the newsletter at the bottom of our website ''www.makersgeneration.net'' for more events, tutorials, and freebies.
Subscribe to the Facebook group if you have yet registered. Content and tutorials are shared daily: Create and build STEM projects for kids
We can be reached at: contact@makersgeneration.net if any questions.
See you on soon.


